Sunday, September 21, 2014

AP Studio Art - Sample Art Works

My children attend an AP school, meaning they begin taking Advanced Placement courses as early as eighth grade and may take up to eight AP courses and six AP exams® by the end of their junior year. Yes, super intense and academically rigorous - and art is taken just as seriously!

This is the first year our school is offering AP studio art. (The school has only been opened for two years.) Below are samples of Ms. Delesandro's class for the current semester.


Taking AP classes offers opportunity to forgo introductory college courses, giving student the chance to take more in-depth classes sooner. 


 Sarah B. 11 Grade
AP studio art classes include drawing, two- and three-dimensional art, and design. AP studio art is  not available at every high school, even those that offer AP courses in more-accademic disciplines. Like the academic AP courses, Advanced Placement studio art classes are intended to offer a more intense collegiate learning experience.


Cathy L. 9thb Grade


Here in Arizona, highschool students are required to take at least one Fine Arts class before graduating. With more students overall in AP classes (in our school), applicants struggle to stand out. AP studio art seem to be the choice for some to achieve graduation and college breadth requirements.


 Sarah B. 11 Grade
Most of the students have not had extensive art experience and just dived in. I am totally in awe of the work they have produced so far.

How do you feel about art being offered as an AP course?

    Monday, September 15, 2014

    Van Gogh Inspired Sunflowers

    This past weekend I helped my friend celebrate her daughter's 10th birthday with an art party.

    The inspiration for the project was Van Gogh's Sun Flower and Starry Night, probably two of his most recognizable works or art.


    She watched a tutorial on YouTube, purchased paints, brushes and 16x20 canvas for each party guest. With a few simple steps, you too can turn your living room into an artist's studio.


    The kids painted and afterwards got to keep a beautiful piece of art as their party favor.

    Give this project a try and let me know what you think.


    Monday, September 1, 2014

    Upcycled Picasso Masks

    Much to my husbands chagrin, I can't seem to trash the bits and pieces that are left over from other craft projects. Even the shortest length of ribbon makes it into a bin marked "save do not through out". Not only do I feel better for not throwing out perfectly "good stuff" into the garbage, it helps keep my art projects cost low.


    A really great project for making use of all the bits and pieces is African masks. Not only can you teach students about recycling, it is a fun way to teach about the famous abstract artist, Pablo Picasso. They will also learn how to use recyclables to make simple lines to create faces and then rearrange them to appear like abstract faces in the style of Pablo Picasso.


    It's a fun mixed media  project that involves several techniques and can be tied to literacy when you include West African Folklore.


    It is also great for integrating math by discussing how geometric shapes are in elements of art.


    Supplies:

    Cardboard boxes
    Hot Glue
    Tacky Glue
    Paint of your choice
    Assorted Ribbons, Pipe Cleaners, Buttons and Jewelry Pieces, etc...

    First, you will want to pre-cut the corners of a sturdy corrugated box and punch/drill out holes for hanging your finished mask.

    Next, have students paint the cardboard masks and let dry.

    Now for the fun part...using Tacky Glue have students embellish with buttons, ribbons, bits of jewelry, etc...There' no right or wrong, just let that imaginations take over. Have an adult use hot glue for heavier pieces.

    TIP: For additional texture and dimension, prime your corrugated box corner with Plaster-of-Paris before painting. (Take plaster-of-Paris and add water until it looks like the consistency of glue.) 

    We made the masks above as part of a school wide fundraiser two years ago. By incorporating recyclables into our projects it kept our supply cost at $300 for school of 550 students.

     How about you? Any upcycled projects to share?


    Monday, August 18, 2014

    Fun and Low Cost First Day Art Mural

    Hello everyone - it's been a while since my last post. We were away in France and had very little Internet. It was a big adjustment for me and the kids to not have WiFi, but it allowed us to focus on low tech activities...like playing cards, scrabble and of course, art!

    I will tell you about my adventure in France a little later, but first I wanted to share with you a Fun and Low Cost first day art project. I love collaborative projects for the first day because requires students to communicate and work together to produce a special piece of art. In addition, it is great for introduction to the elements of art.

    Juan Miro and Paul Klee and two great artist that that come to mind when working in groups. 


    Image: Experiments in Art Education

    Have students to outline their shapes- squares, circles, triangles, etc.. (no need to sketch) with black tempera paint. Then have them connect the shapes using lines - straight, zig-zag, wave, etc... Allow paint to dry for a bit (in AZ it only takes a couple of seconds) and then fill in the shapes using bold colors.


    Image: Gretchen's Art
    Great for all levels, even kindergartners, just make sure to have extra hands to help out. After you are done displaying the murals, you can cut it up to size and then everyone will get a piece to take home.

    TIP: If you don't have large craft paper, use the back of an old poster.

    How about you? What kind of art project do you like to do on the first day?


    Tuesday, May 20, 2014

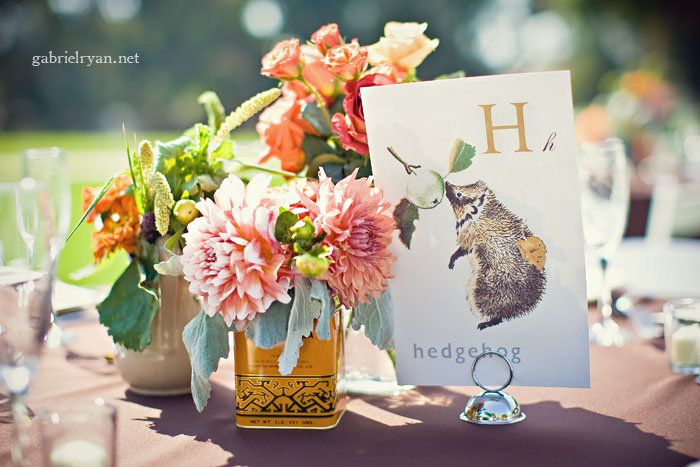
    Upcylced tin for Centerpieces

    I was recently invited to attend a fundraiser for Childsplay's held at the Tempe Center for the Arts. The Theme was "Rock 'n Roll Chic". For the centerpiece they up-cycled coffee tins for centerpieces. These were the large coffee thins covered in paint.

    Here's a tea tin centerpiece from my annual teacher's tea. Even the most simple, understated blooms look stunning in vintage tin can containers.


    Tea Tin Centerpieces from Martha Stewart Weddings .

     How stinking cute would it be to  mix-and-match tea tins for a vintage wedding?


    You can pick up colorful tin cans for next to nothing at thrift shops and flea markets.Or grab some new versions (and enjoy some super delicious teas and coffee to boot). Tip: Before placing arrangements inside, line the tins with a plastic cup or a small container inside.

    I would leve to  read your ideas for a centerpiece.

    Mylien


    XO

    Sunday, May 11, 2014

    DIY Mother's Day Floppy Hat with Coffee Filters

    You might be thinking that hats are for Easter however, students in Ms. Ledderman's and Ms. Dulin's preschool class think they're perfect for Mother's Day!  Each student made a hat for their parent to wear during the Mother's Day tea.


    DIY Coffee Filter Hats
    Coffee filters are inexpensive and so versatile that they can be used for so many different crafts. They are absorbent that when you add colors to them, the colors spread to make beautiful rainbow or tie dye like effects.


    Supplies:

    Industrial size coffee filters (found at restaurant supply store)
    Droppers or water spray (1 for each color)
    Faux Flowers
    Diluted food coloring or tempera paint or diluted water color paint
    Washi Tape or Paper Tape
    Hot glue

    Place opened coffee filter on table, let students decorate by saturating filter using a spray bottle or dropper with diluted food coloring, one color at at time. Place hat on top of inverted bowl to dry.

    Once filter has completely dried and working in pairs, place 1 filter on head. Pull down gently near ears. Wrap Washi tape at brim line to fit head. Flip brim up. Remove from head and attached faux flower using hot glue. Optional: Using a small coffee filter, create a“flower” by pinching filter in middle. Wrap 1" tape at middle/stem. Attach flower at brim with tape.

    Don't you think they are just lovely? I wore mine when my girls "surprised" me with a breakfast of toast and cut fruit and juice. 

    Have a great Mother's Day!

    What about you did you receive a handmade gift? 

    Wednesday, April 23, 2014

    Cherry Blossom Inspired Painting

    With cherry blossoms in full bloom from mid March to Mid April, it inspired me to offer cherry blossom painting during this month's Art Masterpiece. The transcendent beauty of the cherry blossoms have inspired many artists, including Japanese artist Ohara Koson, who was famous for his flower and bird paintings.


    Cherry Blossom by Allessanra

    We painted our own cherry blossoms using a fun and creative technique using drinking straws. I'm all about using inexpensive or recycled materials, and everyday items found around our home. It doesn’t get any easier – painting using a drinking straw! 


    Set out some straws (I had the bendy ones), sheets of block print paper, and some black tempera paint that is thinned out with water and pink tempera for the cherry blossoms. The paint needs to be thin (about the consistency of milk) so that it will move across the page when blown with the straw.

     
    Video by victoriarestrepo.com


    Drop a small amount of paint onto your paper, next position your straw close to the paint and blow. Move the straw upwards and outwards moving the paint into different directions to create tree branches.

    Cherry Blossoms by Brooke
    Cherry Blossoms by Annika

    CHerry Blossoms by Sarah
    Cherry Blossom by Yibo

    It was a lot of fun watching students try to maneuver the paint. Some got the hang of it, while others couldn't quite figure out that they had to continuously blow through the straw while moving upwards to keep the paint moving.

    Visiting Washington, DC during cherry blossom festival is something I highly recomend. How about you? Have you seen cherry blossoms in person?